Home →
TA 100 / TA pro →
Printer Friendly Version
TA 100 / TA pro
1. FAQ
1.1. How to replace the piezo in the TA 100 (DL 100 master)
When working on the DL-100 laser head make sure that you electrically meet the requirement to protect the laser against electrostatic discharge and that the SC110 HV supply and laser supply rack is off.
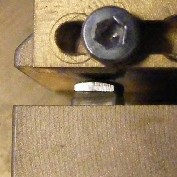
- To facilitate finding the optical alignment after the exchange of the piezo, it is helpful to measure the gap of the piezo mount and write down the number for future reference.
- It is helpful to fix the grating flexure at the current position by using, for example, a suitably chosen stack of washers or the like, such that they are clamped by the flexure (after slightly releasing the tuning screw).
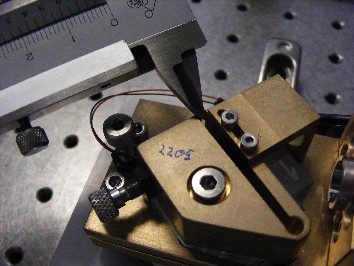
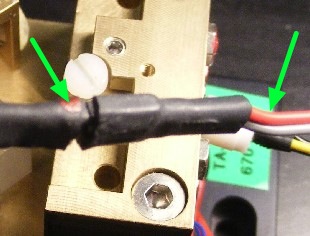
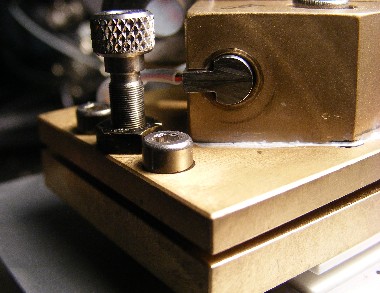
- Unplug the piezo cable. Make sure that the tuning screw is released by a few turns, such that the load of the flexure is completely taken away from both the screw and the piezo. Next unscrew the black screw socket (see picture) and remove it together with the screw. Finally, remove the piezo carefully from the grating holder.
- Now that the old piezo is removed you are ready to install the new piezo. To do so, the same procedure has to be reversed as described in the following steps.It is recommended not to touch the piezo with bare hands. You can handle the piezo at the cable or with unpowdered gloves.
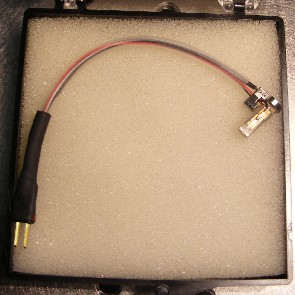
Unmounted piezo with cabling as provided by Toptica.
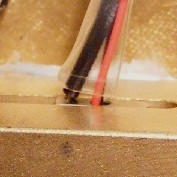
- Be careful to use the correct polarity when connection the piezo: The positive pin is indicated by a dot on the two pin connector and should be connected to the corresponding red wire.
- Carefully insert the piezo into the grating holder with the cables guided thoroughly and freely through the grove until the piezo is just contacting the flexure. Make sure that the cables are well out of the way and cannot be damaged by the ball head of the tuning screw.
 |
|
 |
|
 |
| |
Fig. A |
|
Fig. B |
| |
 |
|
 |
| |
Fig. C |
|
Fig. D |
When mounting the piezo please make sure that:
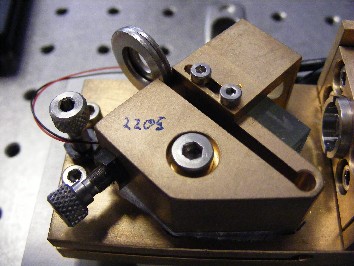
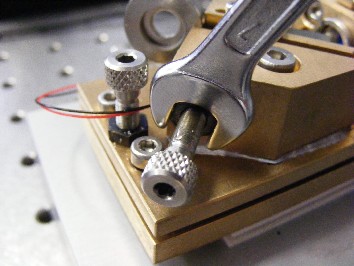
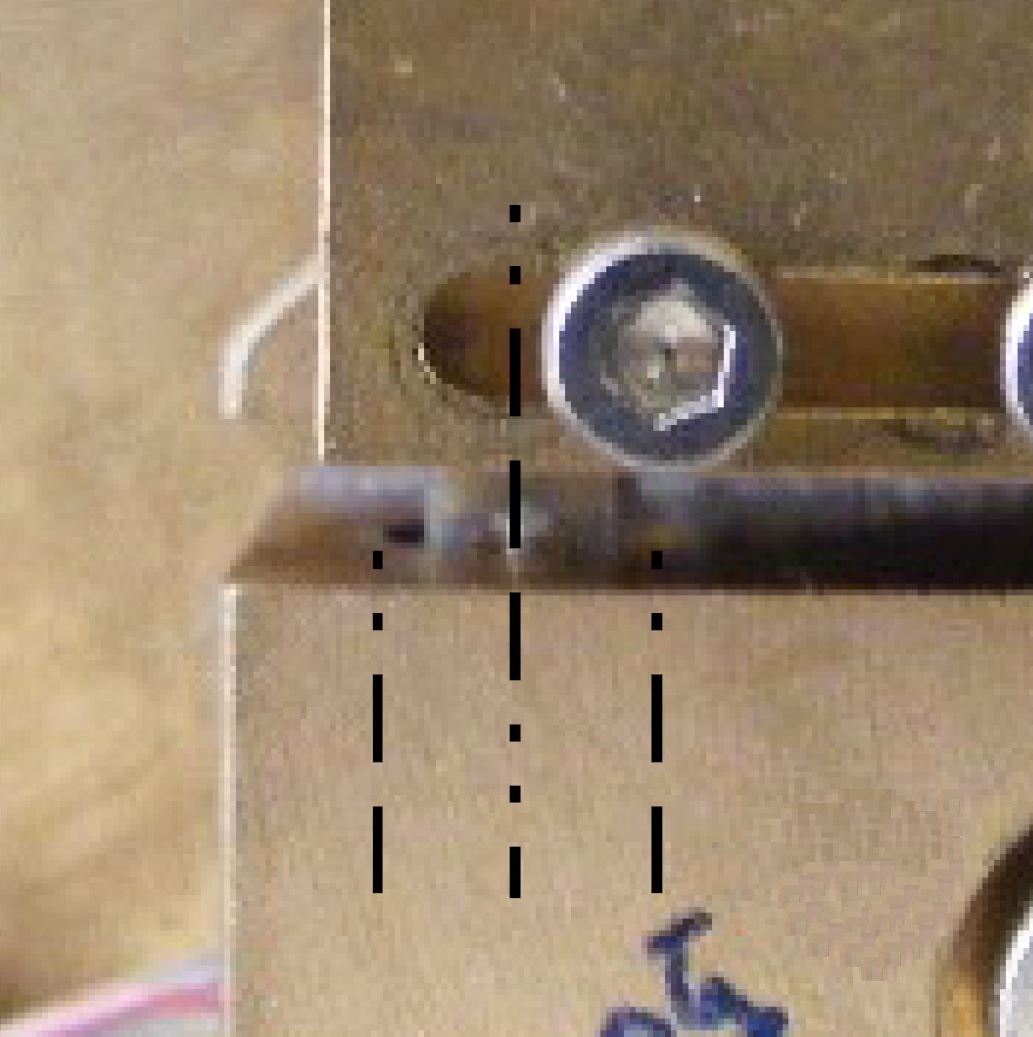
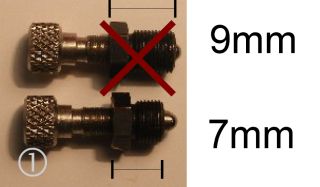
- the black screw socket has the same length (7mm) as the piezo (Fig. D). Otherwise exchange with the screw socket provided.
- The guiding nose of the end piece is properly aligned with the grating holder (Fig. A).
- the piezo is centered not touching the sides of the hole in the grating holder (Fig. B)and that the physical contact to the flexure is at the piezo tip (Fig. C). To verify proper mounting before applying high voltage check the resistance and capacitance (with cable) to be R >> 1MΩ (∞) and C≈235nF, respectively.
- First fix the black screw socket. Then tighten the tuning screw. Before the mechanical load is transferred to the tuning screw and piezo one should check that the piezo is centered with respect to its hole in the grating holder. You can, for example, use a ball driver to properly center the piezo tip horizontally.
- Once the mechanical load is transferred to the piezo, the washer(s) will be released. At that point the alignment is typically close enough to the original to see some feedback. If you do not see any feedback, rotate the tuning screw back and forth a bit first. For optimal performance you should readjust the feedback, i.e. minimize the threshold current.
2. Service
2.1. TA Troubleshooting Guide
The TA 100 / TApro is user serviceable to a certain extent. In order to guide you towards locating and solving the most common problems we are making a troubleshooting workflow diagram available for download.
Before you start
These troubleshooting guides represent only a coarse outline of the steps necessary to get the laser system back to its specification. They do only complement, not replace the user manuals.
Before taking any of the following steps the user must familiarize himself with the hazards involved when mainting a laser source. READ AND FOLLOW THE SAFETY INSTRUCTIONS AND WARNINGS in the user manual carefully before you proceed. TOPTICA can not held be liable for injuries and / or damages caused by improper use of its lasers. If you feel unsure, please contact TOPTICA's service department first. Proceed at your own risk!
